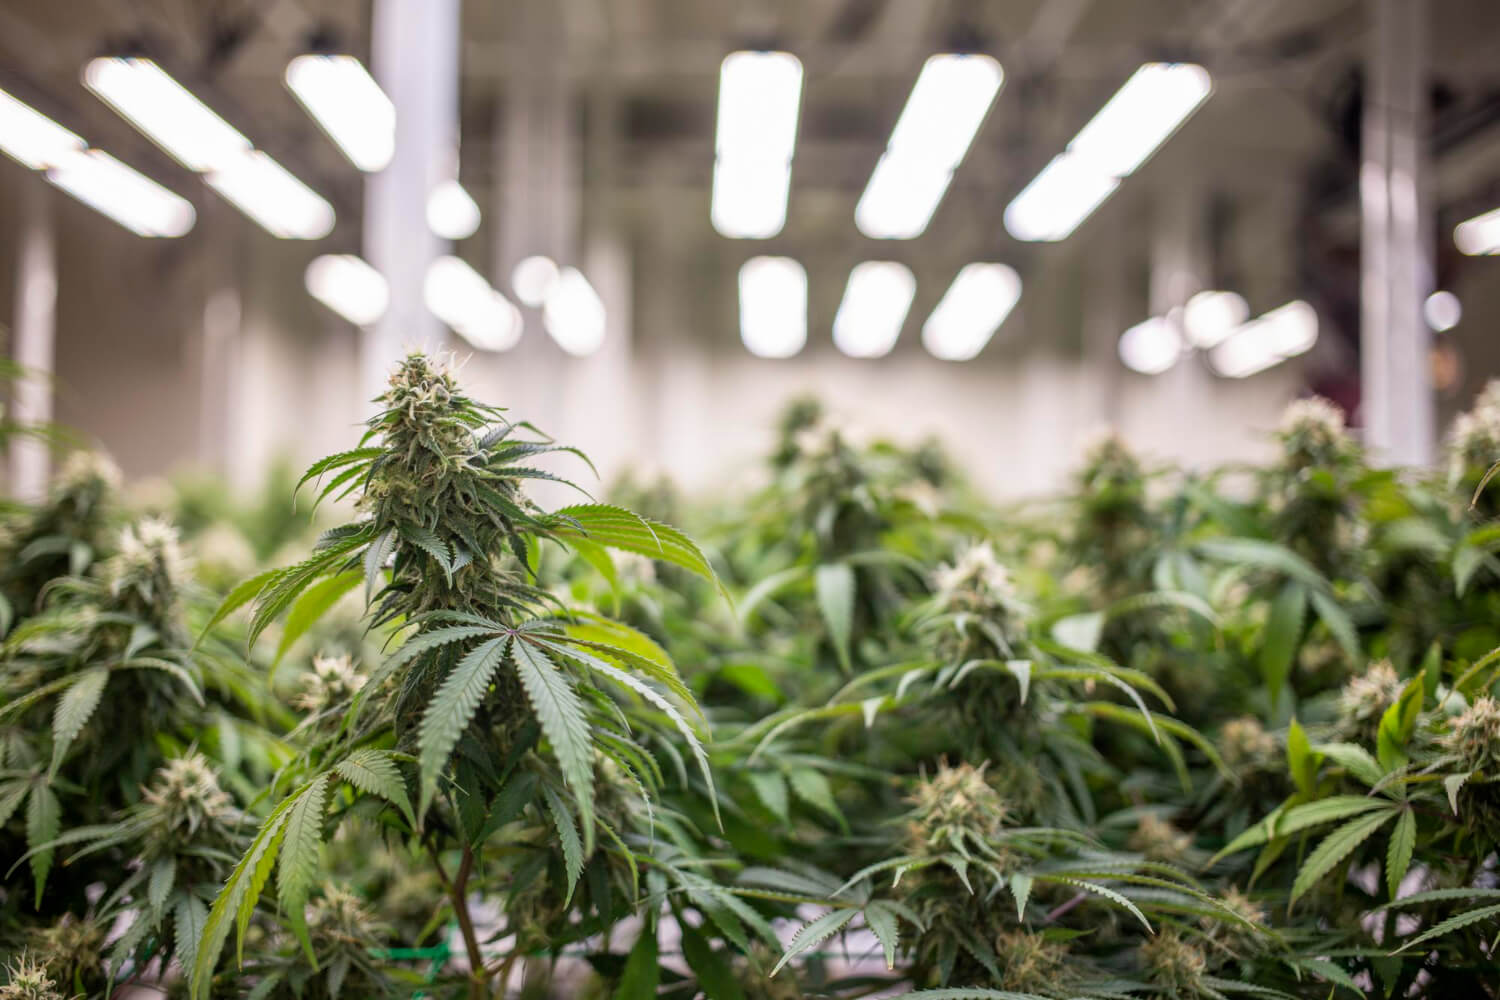
Growing under the sun is a great way to grow cannabis, but it doesn’t give you the control and flower quality that growing cannabis indoors does. As well, growing indoors helps reduce pests and diseases, while additionally allowing you to cultivate year-round. That’s why growing indoors is my preferred method, so let’s learn how to grow cannabis indoors.
The Basics of Indoor Cannabis Cultivation
While growing indoors can easily deliver higher quality and bigger cannabis yields, there are more steps involved than growing outdoors. Cannabis isn’t a houseplant you can stick by a window and call it a day — well, it isn’t when you want good results.
You will need to set up a mini-garden in your house that houses a unique environment separate from everything else. Your plants’ preferred environment is humid and hot, and borderline uncomfortable for most people to stay in for long periods. This means you need a light fixture and equipment that deliver perfect humidity and temperature levels while providing good air circulation.
Last, you can grow any cannabis strain indoors. But to start, I heavily suggest sticking to indicas and hybrids that grow short and wide — use planting training techniques such as HST to promote this structure even more. Sativas are interesting to grow, however, because their long flowering times sometimes make it impossible to grow outdoors in your climate.
Setting Up Your Indoor Grow Space
After you have decided that you want to grow cannabis indoors, comes the time when you need to figure out where you’re going to grow. Closets and basements are the two most popular indoor grow spaces.
A good grow space is a place that doesn’t see much foot traffic, has plenty of height for your plants to grow into, experiences stable temperatures/humidity levels, and is close to a water source. It also helps that you don’t mind if it gets dirty, as gardening is often anything but. It’s also a great idea to find a place where you can make it completely dark, even when growing in a tent, as cannabis is incredibly sensitive to light leaks.
Even when you have open space to grow, a grow tent is still a great idea. They’ll help you better control your environment and separate it away from your house’s environment, they make it easy to hang lights, set up ventilation equipment for air circulation, and keep out pests. They also keep things tidy, which is great for soil growth, and can keep light/heat away from your water reservoir by placing it outside the tent.
Lighting and Nutrient Management
Light Fixture (HID, LED, and CFL) – There are three main styles of light to choose from when it comes to growing cannabis. I’m going to cut straight to the chase. It’s the 2020s, don’t overwhelm yourself with the different types. Just go grab an LED fixture.
LEDs are significantly better for the environment (a big issue with growing indoors), easier to automate and control thanks to phone apps, etc, and create a better light spectrum that can be easily customized, allowing you to control how your plants grow. Since they are no longer a new tech, their price point has come down a lot and often matches HIDs now.
Stay away from LEDs that only deliver blue/red light. Instead, look for broad/full spectrum LEDs that mainly use white light, such as Quantum Boards by HLG or bars from ChilledLED.
Light Schedule – Cannabis is a short-day crop — most crops are day-neutral or long-day. A short-day plant will not flower until it receives around 12+ hours of darkness. Technically, cannabis may be able to flower with slightly fewer hours of darkness, but you have to do things where your lights mimic sunrise/sunset.
During the vegetative stage, where a cannabis plant will grow big and tall, the most common light schedule is 18/6 (lights on/off). After your plant has reached the size you like, you can switch your light schedule to 12/12, which will start the pre-flowering stage. During this time, the plant will easily double in size before turning its attention (energy) to building flowers.
Nutrient Management – Fertigation is the process of delivering nutrients to your plant via watering them (irrigation). Cannabis loves a lot of fertilizer and water — so much so that it’s become more common for cannabis growers to give too much of both rather than too little. Everything from your medium to your latitude can influence the optimal rate you should give. Thankfully, there is a good amount of wiggle room.
There are several ways to tell when you’re giving the right amount of either. Overwatered and underwatered plants will have droopy leaves, too many nutrients will result in climbing runoffs and burnt leaves, while underfed plants turn an overall yellow. Your grow medium will affect how much you should feed, how often, and what pH you should set your water to, so make sure to thoroughly learn about the one you choose.
Harvesting and Curing
When to Harvest
Most cannabis plants are ready to harvest starting around 8-10 weeks after switching your light schedule to 12/12. You will notice a swelling period where the flowers really start engorging, but then come to a fairly sudden stop. Additionally, you will see the white hairs turning orange and receding into the flower. When you see this, it’s time to whip out your trusty microscope or jewelry loupe so you can check the trichomes for changes in color.
As they age, the trichomes turn from clear to cloudy to dark amber. Most growers want to harvest their plants when the trichomes are 80% cloudy, 10% clear, and 10% amber for the most balanced high.
Prepping for Harvest
It’s a good idea to start slowly tapering off nutrients around two weeks before harvest, feeding clean water for the last few days/week. If you have been fertigating properly, there is little reason to flush until research says otherwise — in fact, flushing with excess water due to too high EC levels is terrible for the environment and should be discouraged.
Drying
Immediately after cutting down your plant, it’s time to hang the flowers in a dark room where they should slowly dry for 1-2 weeks. You want a fan for air circulation to keep powdery mildew and mold away, but I suggest keeping direct airflow away as it tends to dry plants out too fast.
Curing
Once the flowers no longer feel damp, but aren’t completely dry, it’s time to place them in a jar for curing — another indicator is that small stems may snap but big ones should only bend.
When curing, you generally want to keep the humidity in the jars between 60-70%, starting on the higher side before settling around 60-62%. To reduce humidity, which will climb past 70% if you dried the flower properly, you need to “burp” the jars by removing the lid until humidity comes back into range.
Troubleshooting Common Indoor Growing Issues
Growing cannabis indoors is a great way to better control your nutrient levels while discouraging pests and diseases, but you aren’t free from them. Often when I see pests in my outdoor garden, it’s a minor nuisance, but if I find one aphid in my indoor garden, my brain breaks. Because when there is one, more will soon come, who will find their way into the rest of your house.
Another reason pests are more annoying inside, and this goes hand-in-hand with nutrient issues seen indoors too, is that indoor plants are often weaker than their outdoor counterparts. This happens because they are used to us babying them — which gives us higher-quality yields in our defense.
So keep your environment clean, make sure you are not overwatering, which promotes pests and diseases, and when in doubt about nutrients, send leaf tissue samples off to a lab, as it’s the best way to tell if you’re feeding the right nutrients in the correct amounts. Be diligent and don’t ignore your garden.
Conclusion
Looking for the highest-quality flower and the biggest yields? If so, you should greatly consider growing indoors. When it’s the dead of winter and there is snow on the ground, nothing is as satisfying as seeing life spring forth thanks to an indoor garden. The mental benefits alone are worth it! Now, the biggest issue with growing indoors is its impact on the environment. Recreating the sun, wind, rain, and on, consumes a lot of energy. Then, poor fertigating practices that force you to flush led to phosphorus runoff and high water consumption. I encourage you to do everything you can to make growing indoors a clean endeavor.


